
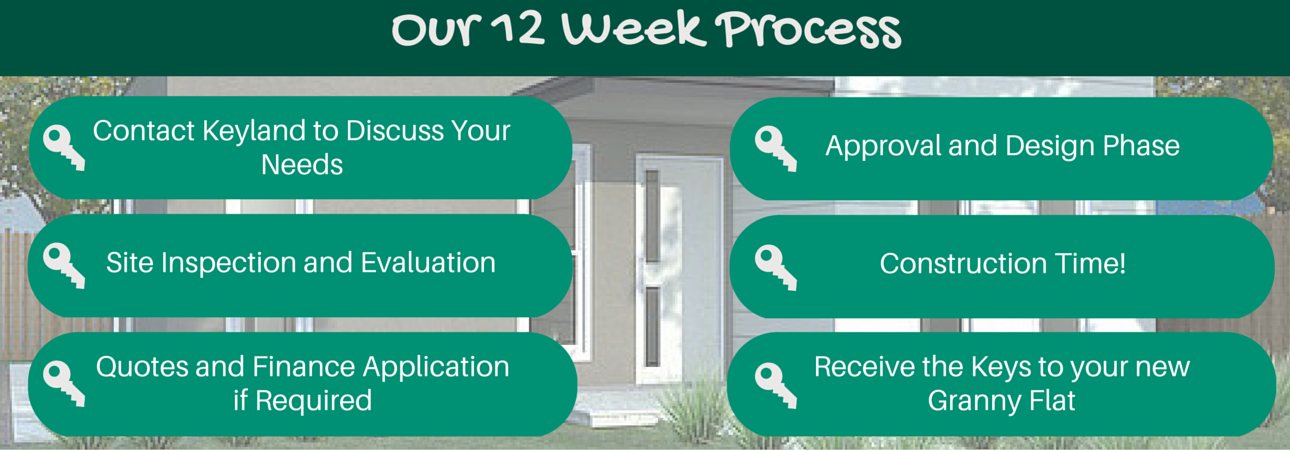
The 6 Steps to Having a Granny Flat in Your Backyard
To start your Granny Flat building process, first get in contact with us. We will then make a time to meet at your property for a site inspection. Then we can discuss the finer details like design requirements costs. We are available at all times to answer any question you may have at any stage in the process. Our aim is to take you from Conception to Completion with ease.
Step 1: Getting Started
Contact Us to book a time for Step 2
Step 2: Site Visit
Prior to the site visit, we will review your property on Google Maps and assess whether your property has the minimum requirements as outlined in Step 1.
Then a representative from Keyland Granny Flats will come and inspect your property, provide you with a preliminary quote for your consideration. A preliminary quote is the cost to build one of our standard designs on your block, plus any site costs and connection of services. This can be used as a basis for the costs for finance purposes.
Step 3: Quotation
During this process, we will provide you with a fixed quote within your budget and if you wish to move forward, a design fee is payable.
A Design Fee covers all the detailed architectural drawings to suit your block, including a basix certificate and basic site contour levels to determine the fall of the block. During this stage, you are given an opportunity to make some changes to one of our standard designs, in order to arrive to suitable tailored solution for you.
Step 4: Design and Approval
Design: Weeks 1 – 2
We are passionate about functional designs, and with a maximum area of 60sqm to play with, we will take the time to understand your needs and ensure the design works.
Once the design is finalised, materials are selected from our standard range and detailed costings will be provided.
Approval: Weeks 3 -5
We will prepare and lodge all the applications necessary for the approval of your granny flat.
Building contract is prepared and signed. Home Owners Warranty is applied for.
Step 5: Construction
We will build the home in your backyard with minimum disturbance to you, and in accordance with your selected materials, colours and design.
Initial weeks involve site establishment and installation of foundations, framing, windows, gutters, facias, eaves and external cladding.
Then insulation to the ceiling and walls is installed, waterproofing, kitchen, tiling and plumbing installation.
Final weeks involve showerscreen and wardrobe fit out, painting, electrical fit out, final clean and final hand over of project to the owner.
The above time frame is typical and may vary on all projects, subject to the weather conditions, availability of materials, complexity of the project, site conditions and other unexpected delays.
Step 6: The Keyland Hand Over – Giving You the Keys to the New Equity in your Land
And a bottle of Champagne to celebrate. it is all part of the Keyland touch.